The thing about glitter is if you get it on you, be prepared to have it on you forever. Glitter is the herpes of craft supplies.
Demetri Martin
Showing posts with label Original Designs. Show all posts

Tuesday, February 21, 2012

Sewing Machine Cover

I had a home alone day yesterday, something that doesn't happen too often. And instead of cleaning or working on something that needed to be done, I made a sewing machine cover

just for me!

Pretty cute, hun?

Monday, November 28, 2011

Thank-you's

It was a busy weekend for the two dolly girls at the Dalplex Christmas Craft Market! It is with residual fatigue that I pop in now to share a few pictures and to take a moment to thank all of our friends and family for their support this Fall as we worked our fingertips bloody to prepare for the season.

It was great to see so many of you out at the show! Your support and encouragement are very much appreciated. We hope you enjoyed the show - the exhibits were all lovely, presented by inspiring crafters hosting an inspirational expanse of wares, treats and services. Hopefully you were able to put a little dent into your Christmas shopping!


All in all a great season and we look forward to next year!

Monday, November 21, 2011

Between Shows

Well, we're minus a few binkies, balls, bibs and dolls following the Acadia show. This week we'll be busy replenishing our stocks in prep for the Dalplex show this upcoming weekend. If you have a chance to make it to this show, we highly recommend it - the vendor list is awesome!! We'll be posting photos of new dolls in the 2011 Craft fair album on our Facebook Page as they are completed - so check back often. Let us know if there's something you would like us to set aside for you to pick up at the show - we're always happy to see our blogging friends at shows!! If you're not able to make it to the show, send us an email at thirdstreethandcrafters(at)gmail(dot)com or by selecting from the options in the "contact TSH" link on the right sidebar.

We'll quickly share a few photos from the Acadia show, then back to doll making!

Our booth...

...again...

...and again.

TSH junior exhibitor


This little dolly got a little tired part way through the show and decided to take matters into her own hands. It's always sad when dolls do that...


Wednesday, January 26, 2011

Making Bread and Constructing a Family Quilt

What is it about making something with your hands that feels so therapeutic and fulfilling?

As you read in my last post, I've recently entered into the world of bread making. Making bread is a deep rooted tradition in my family. My grandmother Chaisson has achieved eternal reverence with regards to her best-in-the-world homemade bread.

When we were children, my sisters and cousins and I all lived for Nan's bread - many of us restricted to enjoying this culinary delight during summer vacation and the rare winter visit to Newfoundland. Sometimes Nan would even make bread on those extra special times when she and Pop came to visit us.

I remember watching Nan in fascination as she would knead the dough with diligence and determination; a perseverance worthy of true admiration.

Soon after my virginal introduction to making bread I had a conversation with my mother - also an accomplished family bread maker - and it was she who identified the labour of making bread as  therapeutic and cleansing. Getting in there with you hands and pounding out the hearty goodness of the dough for the purpose of providing sustenance and enjoyment for your family truly is a satisfying endeavor.

Moreover, it is a great way to purge tension - much like other physically repetitive activities such as biking or running - providing one with a clear and undistributed mind for thinking things through.
Quilting is another well rooted tradition in my family that unites productive therapeutic activity with the wholesome nature of making something meaningful for someone you love. Selecting fabrics, arranging them in ways that convey a desired mood. Combining these elements in a custom that ensures longevity with the purpose of ultimately forming a single entity designed to provide warmth and comfort is - in my books - a very effective means of expressing love.

One of the especially nice things about visiting Nan and Pop was getting to sleep in one of the old kid's rooms warmly snuggled in one of Nan's quilts. Nan made her quilts with scrap fabrics salvaged from other projects, or from worn out garments within the house - curtains, work shirts, sheets. They were the kind of quilts that hugged you - heavy, big and warm. Their myriad of patterns, fabric textures and colours gave them a unique quality and her use of re-purposed fabrics added a personal touch that made you feel safe and at home.

I am fortunate to have one of these precious specimens upstairs, where it usually resides on my Sweetheart's bed.  Decades after it's construction, my grandmother's quilt continues to embrace her family with love and warmth.

It is this degree of love that I hope to convey to my family with the making of my very own family quilt. So far in the process I have assembled my own collection of outgrown, out-fashioned, and plain warn out fabrics that have seen my family throughout its evolution.

This may take me a little bit longer than the two loaves of bread I made for my family, but it is my hope that - like the bread my grandmother made for her family - its sustenance will be felt by the people I love for a long time after its completion.  

Friday, December 3, 2010

Rock Star Cloth Doll by Third Street

I am in love with this new Third Street Rock Star doll.


Decked out in his Dad's hand me down jeans and dress shirt, this little dude is totally rockin' his own hipster style.  His ill-equipped seamstress girlfriend (humbly known on Third Street as The Machine) went into chain stitch overdrive on this one.  Tightly HAND EMBROIDERED chain stitches offer up bold lines for the star, the 45, and the steel glasses.  The fine detailing, frames and lettering are done BY HAND using a back stitch and his gorgeous Third Street eyes are done in our characteristic satin stitch.  Which was also done A LA MAIN. 

Is my redundancy irritating?  Yes.  But - I have an ulterior motive fueled by only a wee bit of resentment .... Which I will not allow myself or the lovely readers of this blog to be bothered by any further, as its cause is not even worth mentioning in the company of true appreciators of handcrafted goods ... and people who are insightful enough to recognize inherent skill when its achievement is justly earned.  Painstakingly, in fact.  But let's get back to the doll, shall we?

Once he was finished according to the custom order criteria, I felt this doll was still missing something. Then I decided the little dude's inner child was just screaming for some vinyl.  Aren't we all? So I kicked it old school and payed homage to the black circle.  

I think this little buddy is going to look sweet in Jack's Rock Star nursery

So let's hear it for all the Rock Star babies out there:

Tuesday, November 16, 2010

Christmas Craft Village

This past weekend was The Christmas Craft Village at Exhibition Park here in Halifax.  This was our first time doing a show of this size, which was very exciting.  

Setting up our booth was challenging as we suddenly had so much space to work with ... and to fill.  Luckily our father is amazing - as always - and helped out with our display by making us even more props.  We were able to showcase all of our wares beautifully with these new crates he built especially for this show.  

We had all of our Third Street gear on hand.  Christmas sleds, tree ornaments, and quilted runners were joined by our new Christmas and winter dolls.  Dolls, balls, binkies and bibs were there, as well as our newest original design hand embroidered onsies.  Dad's doll furniture was also available for sale, including rocking chairs, table and chairs, and a darling little bed.


Third Street was pleased to be sharing space with tons of talented crafters and artisans and we were happy to have time to catch up with some of our awesome crafter friends.

We had the added pleasure of showing alongside Jerry Walsh's Distinctive Garden Accents featuring beautiful rustic bird houses (nesting boxes), bird feeders, bat houses, squirrel houses and signs. Jerry strives to use wood that has been around for a while and has acquired a degree of character including driftwood boards and recycled wood salvaged from structures such as old barns. Many of his pieces are accented by highly skilled decorative painting used to highlight the natural beauty of the wood (compliments of Jerry's wonderful wife - a talented tole painter amongst other things - whom we also had the pleasure of meeting).
 
Be sure to swing by Jerry's site for Christmas ideas for the nature and bird lovers on your holiday shopping list.

We were visited by many friends during the show, some of whom even brought us treats. Thanks K :)

As well, we completed several dolls including this little guy - our very first Action Figure / Super Hero.  Since this photo, "The Shocker" has acquired a utility belt and the idea for a cape is brewing.  He also has a new POWerful friend who has yet to be photographed.  I will try to get photos of the other lovelies to share with you all in the next little bit.


Saturday, November 13, 2010

1 2 3 4 5 6 Stitch

We're headed back to Exhibition Park again this morning for another day of working the Street. Yesterday and last night flew by! We met some great artists and crafters, chatted with good friends, got the juice on some interesting happenings, and got to listen to some awesome music. Plus, we completed 5 (6?) new dolls, including a spectacular boy super hero. Pictures taken and will be shared once all is complete.

For anyone interested in attending, the details are here. There are still two days left, come on down and get your craft on with Third Street!

Friday, November 5, 2010

Pull up your candy cane pantyhose and come visit us at the
Christams Craft Village
next weekend at Exhibition Park.
It's a three day show with over 100 vendors!!

Friday, Nov. 12 from 10-9
Saturday, Nov. 13 from 10-6
Sunday, Nov 14 from 10-5
  
We're in booth 105 in the second room near the performance stage.

Binkies
Soft Play Balls
Baby and Toddler Bibs
Bean Bags
Lady Lou Cushions
Hand Embroidered Onsies featuring original TSH designs
Doll Quilts 

Christmas Tree Ornaments
Hand Painted Christmas Sleds
Quilted Patchwork Christmas Runners

And of course,
Oodles and Oodles of Original TSH Dolls
Including Special Edition
 Chinese New Year Dolls and Santa's Little Helper Dolls
As well as Dad's Handmade Wooden Doll Furniture

Plus we will be available for custom ordering!

For a complete listing of participating vendors, please chick here.

See the Third Street Handcrafters Facebook Page for a chance to win a free pass to the show!!

Wednesday, August 11, 2010

Summer Quilt Finished!

Sunday was my little friend Sophie's 2nd birthday party.  I had to miss out on the festivities because I was working but I sent my three sweetest reps to present Sophie with her present.  


I hope she loves snuggling with this sweet child - sized lap quilt!

Almost all of the fabrics used in the patchwork are upcycled.  Even the batting is a hodgepodge of large pieces left over from past projects. 

The watermelon pink block on the far left in the picture below came from a second hand skirt my daughter wore as a toddler.  Last year, for Sophie's first birthday, I made her a Third Street cloth doll using this fabric for the dress.  I was so pleased to find I had enough of this fabric left over from the doll to use some in Sophie's quilt - such a delightful little bonus.  

The bright blue floral print came from the lining of an Old Navy handbag that I had bought several years ago on a trip to Boston.  I bought this bag for a ridiculously low price and I think I only used it once or twice.  But I kept it - and I'm so glad I did. 

The dark red came from a second hand red linen dress shirt that I've used in a few different projects I've shared here and here.  The yellow floral block that is repeated throughout the quilt top came from a second hand dress my daughter wore that I also used for this Third Street turning point doll (very first doll made from an original Third Street Pattern).  The dark green pieces were taken from a second hand dress I wore for a long time but had to reluctantly surrender as its seams were under a great deal of undue strain...  The red floral print came from a piece of fabric I snagged from Frenchy's and very pale pink squares came from Mom - our number one upcycled fabric supply contact. 


Of the few new fabric pieces used for this top,  the majority were taken from our scrap pile.  Only about two or three blocks were actually cut from larger pieces of new fabric - once our upcycled and scrap stashes had been fully exploited.    

For the backing I used a new piece of cotton flannelette in baby blue with a puppy print - because Sophie loves dogs. 

Just like the sweetheart it was made for, this quilt is the harmonization of so many cherished parts.

Sunday, August 1, 2010

Newest Cloth Doll Listed in the Third Street Corner Store on Etsy.


My Sweetest and I recently did a photo shoot with the newest cloth dolls from Third Street.
This doll was just listed today.
If you get a chance to stop by, she'd be delighted to show you around the shop and introduce you to all her friends.


Hope you all had a great weekend!
Sonia and family are back from China, and we all finally got to meet the adorable Aster.  
We had a great weekend!

I'm sure we'll all be treated to some travel stories and pictures in the days to come.
Or, maybe in the weeks to come. 

Bear with her folks: she's a new mom.

Did you hear me? 
Let me say it again.

Sonia's a mommy!

Yippee Yahoo!!!

Congratulations!!

Tuesday, July 6, 2010

For Aster, Love Auntie :: Wall Hanging Tutorial

As I shared with you all a few posts back, I recently made a wall hanging for my new niece's bedroom as a shower gift.  Time is fast approaching - Sonia has started packing for their big trip and Aster will be coming home with her Mommy and Daddy the end of this month!!

Aster's arrival marks my entry into the roll of Auntie and I am elated, to put it mildly.  I wanted to make something that would serve as a timeless expression of the carefree nature of childhood. 

When I started this picture I was in the midst of a yo yo fascination and wanted to do something that incorporated these little delights.  Heather Bailey has a lovely yo yo tutorial on her blog that I found helpful. 

After hand stitching about twenty different sized fabric yo yos in a vast array of colours and patterns, I found the most luxurious turquiosy cotton batik print and started working on a layout.  I had initially planned to use the yo yos as flowers, but once I got to putting things together I decided they looked awfully cute floating in the sky like a cluster of balloons. 

 
I began by affixing my batik print to some fusible interfacing.  Then I started putting the picture together: a rather large yellow yo yo became a tree and a few smaller ones were overlapped and hand stitched together to form a bush. A makeshift model of the little girl was formed with the intended fabrics and a layout was achieved. 

The pink cotton print used for the dress is the same fabric Sonia chose for Aster's doll (presently in the severed limb phase) and was up cycled from a second hand skirt.  The smallest yo yo I could manage would be a flower for the little girl's hair.

 
I then chose an assortment of vintage buttons we had on hand to place in the centre of the yo yos - you know, just to make them even more darling.  I soaked the buttons in some vinegar thinking that this would render the buttons their shiniest.  I thought that since this works for pennies...  Anyway, the buttons looked fabulous - all except the small green one which was ultimately replaced by some fabric buttons that I made myself! with a few scraps I had on hand.  I then attached buttons to the centre of all yo yos destined to be balloons.

This picture is sort of jumping ahead (just pretend you don't see the strings I have yet to stitch ...)  Next I decided on the configuration for the balloon cluster and hand stitched all the yo yos to one another accordingly.

I then started to make the little girl.  I used some scrap flannel in cream for her face and a small piece of black felt for her hair cut pretty much randomly into the size and shapes that I wanted.  I cut a slit in the felt to form the hair line (big enough to pass the flannel through), placed the head into the hair (...hair styling enthusiast...).  I then stitched along the front to accent the bangs and bind the two pieces together.

Next I chose a piece of yellow leafy tone-on-tone and formed two overlapping hills.  I cut a two dimensional dress shape from the pink fabric and used a gathering stitch to form a pleated neckline for extra dimension.  I then positioned the dress onto the backing where I wanted the little girl to stand and machine stitched around the dress.  I placed the head in position and machine stitched around the face to secure the head and hair to the dress and the backing.   

Needle n' Thread, created by Mary Corbet, is an excellent hand embroidery resource on the web featuring excellent step-by-step instructions and videos for embroidery enthusiasts. 

The hand embroidered elements of this picture began with the little girl:  I started with her sweet little eyes and added some texture to her hair with some black back stitching.    Knowing that I would later add a backing fabric, I embroidered straight through all layers of fabric which saved time as I didn't have to worry about cleaning up all the stray ends of embroidery floss.  

Next I used a split stitch to form a heavy line for the tree trunk, partnered with a darker brown running stitch to add some bulk and shape.

Using a fast fade fabric marker I then marked on the picture where all the balloons were going to be positioned, drew a line to where the girl's hand would ultimately be positioned and formed the strings using  running stitches in different colours for all the different balloons.  As the strings came closer to the girls would-be hand I whipped the stitches to give the illusion of the strings twisting around each other.  I then hand stitched the yo yo bush to the backing fabric at the base of the tree.

Here I gave the little girl some arms to hold on to her balloons and hand stitched the arranged balloon cluster in place on the picture.

Finally I signed my picture using a back stitch and added a iridescent cream tone-on-tone 1 1/2 inch fabric frame.  With top sides facing inward I machine stitched the picture to a piece of cream flannel leaving a 3 inch gap for turning.  I then trimmed my seam to 1/4 inch, snipped off the excess fabric at the corners and flipped the entire piece right side out.  After carefully pressing with a hot iron I turned in the edges of the opening I had left for turning and applied a 1/4 inch straight machine stitch to the outside parameter of the frame, closing the gap and adding a nice finishing touch.  I then looped some ribbon to form two hangers and Aster's picture from Auntie was complete!!


Now I get to eagerly wait for my new niece to arrive home so I can show her this special picture Auntie made just for her.
I hope you enjoyed my tutorial!! 
I'd like to add a special thank you to Heather Bailey and Mary Corbet for their ever helpful online tutorials.

abc buttonShow and Tell ORANGE
Get your craft on Thurs.giveaways

Tuesday, June 29, 2010

Soakin' Up the Sun

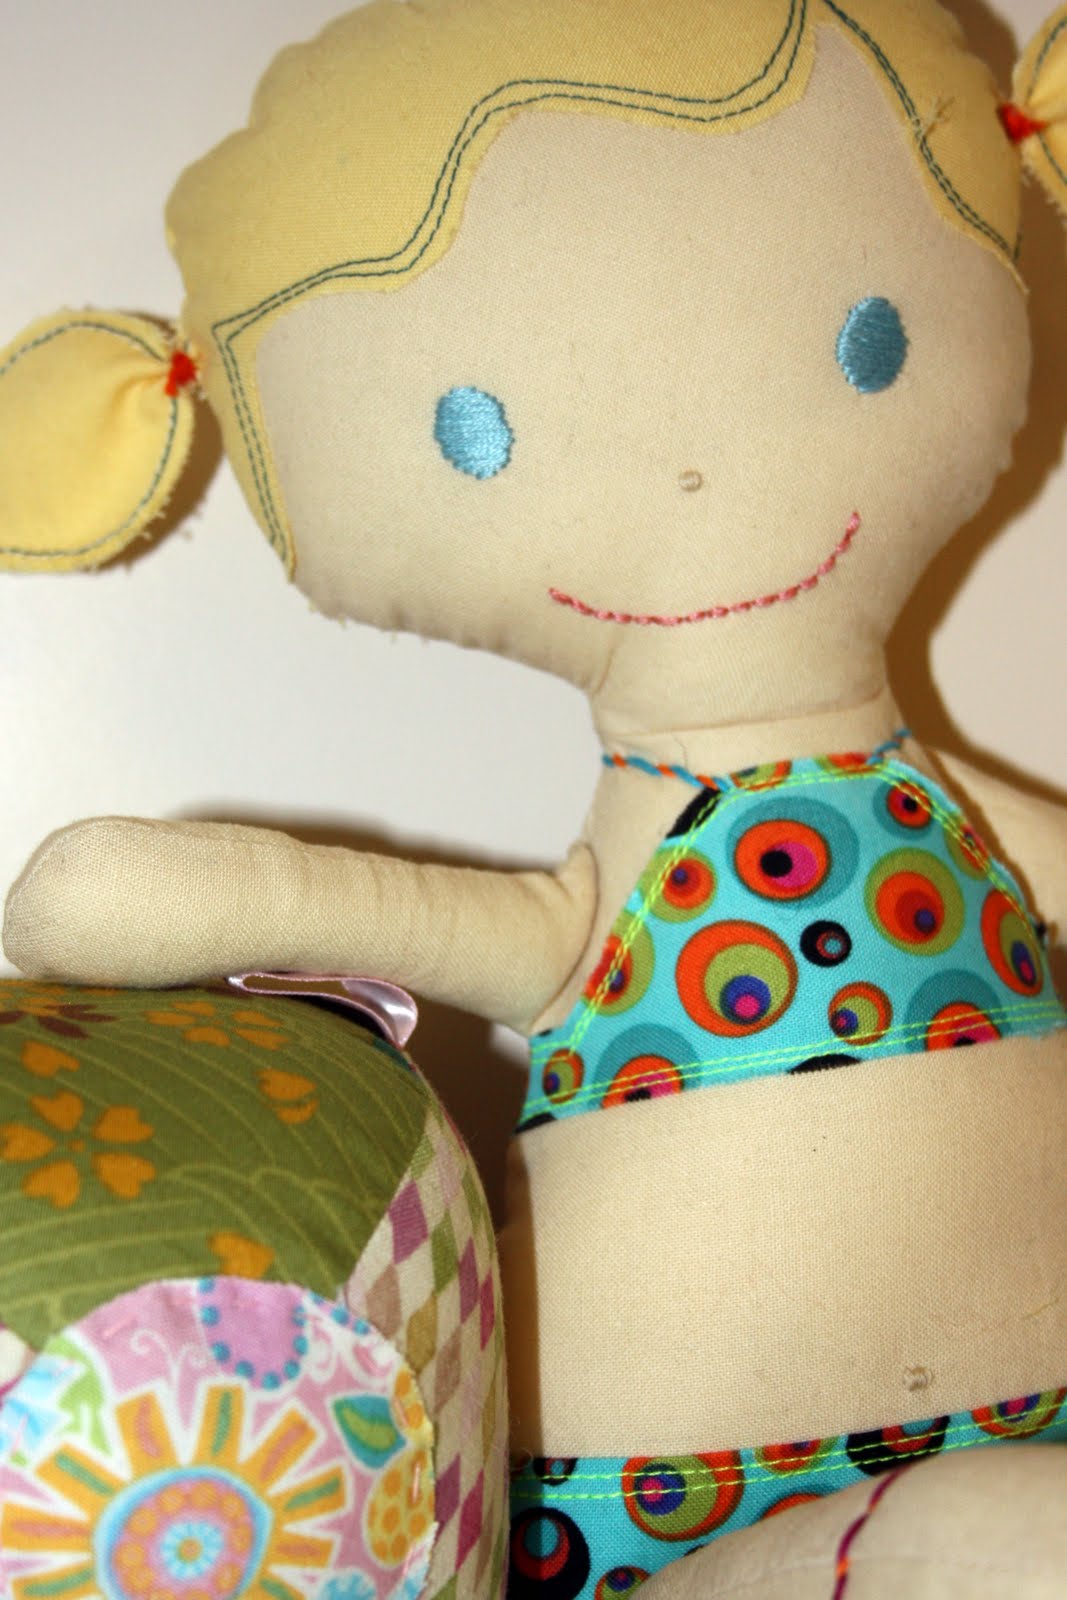
Thanks to Colleen from Curtains are Open, we recently recieved a commission to do two dolls dressed for the beach.  Colleen's good friend Kim was looking for a special surprise for her two little girls upon arrival to their cottage following the end of the school year.

These are the two little beach bum-ettes:


Polka dot bikinis!!!


Complete with hand embroidered bikini straps, anklettes, toe nail polish, and yes ... as promised ... belly buttons!!!

Turquoise and green.

Pink and orange.

I think that Kim's little dolls are going to love their surprises when they get to the cottage this summer.  What lucky girls!!  
We're linking to:


Make it Yours @ My Backyard Eden


Blue Cricket Design

giveaways


Get your craft on Thurs.

UndertheTableandDreaming

abc button


Dragonfly Designs


LinkWithin

Related Posts with Thumbnails